"One does not discover new lands without consenting to lose sight of the shore for a very long time." -Andre Gide


Sunday, February 28, 2010

How to Photograph Water

Instead of learning why Haiti's earthquake is worse than Chile's, we drove up the coast yesterday, during the tsunami warning, to take pictures.  Basically, I am a total hack with a great camera and an amazing landscape. I feel like I’ve cheated somehow. I don’t even know what an f-stop is, but I will now proceed to give you advice on how to photograph water.


The first rule of thumb is to take lots of pictures. In this digital age, who cares? What does it cost to take 400 pictures? Essentially nothing! So, I took about 400 pictures and then deleted all the ones I didn’t like . . . which was, oh, about 300 of them!  I used my 55-200mm lens the entire day.  And, I probably should buy a tripod . . . you will soon see why!

The second lesson I learned is to keep the horizon horizontal. It seems basic, I know. Bear with me.
Clearly I have demonstrated that a crooked water-sky line ruins the picture! 
These turned out a little better . .

The third lesson I learned is that it is really hard to photograph a rainbow.  I was using auto-focus and the camera didn't know what to focus on.  Even on manual focus, I didn't know what to focus on!  Trying to decide which particle of water was the focal point was . . . a little schizophrenic!
Anyhow, it ended up being a wonderful afternoon excursion.  We doubled back on this beautiful scenery today for Truman's long run.  He did 18 miles!  I did 6.

Saturday, February 27, 2010

Is this El Nino?

So, basically, it has rained 8 out of the last 10 days.  But, we have a spot of sun today!  Hallelujah! I am off to the library to get a few books.  I've got a request queue, but only one book has come in. 

Here is my queue:
How to Photograph Water by Heather Angel
The Sweet Life by Mia King
Islands in the Stream by Ernest Hemingway
It takes Two by Patricia Chen
The Motion of the Ocean: 1 Small Boat, 2 Average Lovers, and a Woman's Search for the Meaning of Wife by Janna Cawrse Esarey

The only one that I expect to pick up today is "How to Photograph Water".  But, hopefully, with all the rain, waves, puddles, etc....I will be able to post some great water shots by the end of the weekend!
 
I will take this opportunity to also explain why we haven't posted many actual sailing pictures.  The reason is because the Captain usually goes out on the ocean by himself or with another mate.  He takes a couple one-handed shots with his iphone...and, waalaa.....


Yes, we will definitely be working on this! 

Wednesday, February 24, 2010

Part II: Leaking Porthole and Portlight fixes that REALLY work!


Supplies:

3-5 sunny days in a row!
Putty knife
Acetone
Plastic shims
Masking tape
3M Marine Adhesive Sealant 5200

Step 1: Remove window.
Break the exterior window seal (ie. old caulk, sealant, gasket, etc.) with metal or plastic putty knife/scraper. Careful with a metal scaper as it can scatch the fiberglass. I ended up with a few scatches but they easily buffed out. Remove screws from galley side of window casing. From the interior, tap window frame with rubber mallet to loosen the seal.

Step 2: Remove old caulk.
Remove all old caulk or sealant from all surfaces, including window and boat hull.
Start with metal or plastic putty knife to get the bulk off and then continue with acetone or other paint thinner.

Step 3: Inspect.
Inspect all surfaces: wood core of boat hull (between the interior and exterior fiberglass layers) for water damage. If not already done, epoxy over any exposed areas. If water damage is found, please address appropriately. Good advice in general but my Coronado 25 is just fiberglass no wood core so I could skip this.

Step 4: Apply generous amount of caulking to window frame.
Insert window frame into the hole in the boat. Place the ¼ inch or smaller shims around the exterior edge of the window frame, between the frame and the hull. I used wood shims on the first window and one broke off with bits of it stuck in the caulk. Plastic worked much better. Tighten down window onto shims making sure there is a gap. The caulk will naturally squeeze out around the edge, but this is good because it creates a new seal. Wipe excess with rag. LET SET for 2 days.

Step 5: Remove shims.
Remove shims and tighten down the screws completely. Allow to SET for 5-7 days.

Sunday, February 21, 2010

Sea Salt: The Salt of the Earth


The Cayucos sisters at the Brown Butter Cookie Company are on to something good! They just appeared on the Rachel Ray Show!!! But, by featuring real sea salt on their cookies, they’ve not only added taste, but nutrients that many of us may rarely encounter elsewhere. If you haven’t gotten on the sea salt train, let me entice you to come aboard!

Almost all traditional cultures use some salt. Salt provides sodium and chloride which aid in proper functioning of many organ systems, especially the brain. The chloride component activates amylases which work in the stomach and intestine to digest carbohydrates. Excessive intake of salt can be harmful, but complete deprivation of salt is equally disruptive to the system.

Why use sea salt? Sun dried sea salt is naturally occurring, comes in many colors, and appears wet. It contains traces of marine life, organic forms of iodine, magnesium salts, and nearly 80 other trace minerals. The best source comes from the Celtic Sea, is harvested according to ancient methods, and appears grey. But, most of all, it tastes better, richer, and “more complex”, to borrow from the vintner’s vernacular.

Sea salt has a dual nature in Eastern cultures. Its yin nature brings a person “down to earth”; it strengthens digestion and secretion. It is cooling, directing energy inward and lower. Salt is also thought to purify, cleanse, and counteract poisoning from poor-quality foods and unhealthy food combinations. It is thought to soften some areas of the body and tighten others. It is a “contractive” element rather than expansive.

What is wrong with table salt? Table salt is highly refined and altered to create the appearance of dryness, whiteness, and uniformity. The magnesium is removed; aluminum compounds are added. To replace the natural iodine salts, potassium iodide is added. Sea salt is truly a thing of great worth and reliability. It is good for cooking and seasoning. Try something new! It is an adventure! Once you try it, you’ll never go back.

When I asked one of the sisters at the Little Market why they used Sea Salt on their cookies and not table salt or kosher salt, she said, “Because we like the taste!”

"You are the salt of the earth; but if the salt has become tasteless, how can it be made salty again? It is no longer good for anything, except to be thrown out and trampled under foot by men. Matthew 5:13 (NAS)

Sources: Nourishing Traditions by Sally Fallon, Healing with Whole Foods by Paul Pitchford

Saturday, February 20, 2010

Ahhh . . . I Want More Of the Provincial Life!


When we visited Leuven, home of Stella Artois, we found these charming cafe patios filled with your average elderly Belgian afternoon beer drinkers!
Gotta LOVE it!
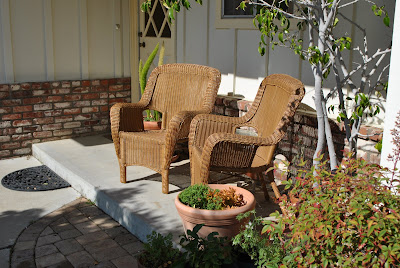
This morning, I tried to recreate that feeling on our front porch!

~Loo


Friday, February 19, 2010

Part I: Leaking porthole and portlight short-cuts that never work


In a 40 year old boat, leaks are bound to spring up around portlights. Many newer boats even have this problem due to environmental exposure, heat expansion, and flexiblity properties of the material the portlight is constructed of and the fiberglass that it is adhered to.

The first thing I learned during my anti-leak crusade is what many of you maybe thinking, "What is a portlight?" According to http://www.seatalk.info/, a porthole is an opening in a boat that allows light and air to enter a boat. Often a clear glass portlight is attached to the porthole with hinges and can be closed with a gasket to make a waterproof seal. In land lubber terms, if the window opens it is a porthole and if it doesn't as on our Coronado 25 then it is a portlight. Now that we have our terms straight, let's get on to some things that most boat owners try and never work.

The biggest waste of time is slopping on a nice wide stripe of clear caulk over the gap in between window glass and its frame. Other than being a complete waste time, this also looks unsightly as the clear caulk often turns a chaulky, oxidized white with sun exposure. Leaks rarely come from this area because the flexibility and heat expansion of the window and it's frame are usually not that different and the glazing material is well hid from sun exposure making for a very long life and secure bond.

What sometimes works but usually doesn't is applying caulk over the gap between the portlight frame and the hull of the boat. This is where most leaks come from. However, applying caulk over the old caulk or other material used often doesn't work for a couple reasons. Once old caulk has dried, the new caulk doesn't adhere well to the old caulk. Another cause of leakage is that the caulk bridging the gap requires a much greater flexibility tolerance than caulk directly between the two surfaces. All it takes is microscopic gap to cause a capillary effect that will actually draw water into the boat.

The final short cut that rarely works is tightening down the screws or bolts that are securing the clam shell type portlights on most boats. And the reason this usually fails? You guessed it: the boat flexes. Tightening down the frame can sometimes lead to striping of the screws or bolts, but mostly reduces the elasticity of the caulk or other material used to create the seal. Even if it does provide some temporary relief, the first crew person to walk on the deck near the window will break the seal again because the caulk now has reduced tolerance to flexing of the hull.

What did I learn? As I have learned many times before, shortcuts have very little use in sailing and usually just cause more work. Specifically for the portlights, I learned the caulk used to make the water tight seals on the portlights has two main purposes: to adhere to the hull of the boat and portlight creating a water tight seal and to provide a buffer or flex point that allows the fiberglass hull and aluminum or steel frame of the portlight to move in different directions while still keeping the seal.

My next post will go through resealing the portlights the right way!

Tuesday, February 16, 2010

Painting the Boat


Painting a boat is hard work! It took us about three weeks to paint the bottom of our boat. We painted from the middle hull edge to the water line. We did the whole job with the boat in the water in the slip. It might be easier to take the boat out of the water, but it costs more money.
First, you must try to clean and remove as much wax as possible. Take off all vinyl labels, names, and numbers with a putty knife. You can do this by cleaning with any average boat hull cleaner. We also did a good once-over with polishing clay to try to get any oxidation and wax off. Then, we sanded it with fine grit sandpaper. Then, we wiped it down with ammonia on a clean rag. Yes, it took a long time!

Second, we taped off all the edges with blue painter’s tape.

Third, we tried to do all of our painting on really warm sunny days. The paint dries quicker that way. A lot of sources suggest using a “Knock down” method of applying the paint to get a good even finish. This consists of applying the paint using a fine knit roller and then going over the subsequent roller marks very lightly with a high quality bristle or foam brush to “Knock Down” the roller streaks. I have never claimed to be a Picasso, but when I tried this method, I ended up with more blemishes from the paint brush than I had with the roller.

So once again using a fine knit roller, I applied two coats with a fairly light touch using standard roller painting technique. I began painting sections of the boat rolling the paint on horizontally and then vertically waiting for the paint to mostly dry before applying the next coat. After the second coat I began to sand each coat using a fine grade sand paper and cleaning any dust with Xylene and tack cloth before applying the next coat. My target was at least 5 coats, but I continued the process until there were no visible color streaks and had achieved a smooth surface. Yes, it took a long time!

Next, buy new vinyl numbers and a new vinyl name cut at a local sign shop. These can be applied easily according to sign shop specifications.

We are hoping to never have to do that again! We’d probably sell the boat before painting it again!

~Captain
p.s. A shout out to Kate J. for applying couple coats!

Flowers for Ellen! Taken with the New Camera!


I love you, Sis! Hang in there!
hugs,
Lauren

Thursday, February 11, 2010

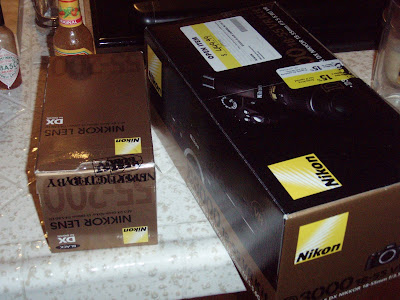
I got my New Camera!!!! Let the REAL Blogging Begin!


The Nikon D3000!!!! To Jill and Karla: You've been an inspiration!
~Lauren

Tuesday, February 9, 2010

Refinishing Teak


First and foremost, there is not that much wood on the Coronado 25. It is mostly fiberglass, but the teak we did have, we wanted to look good! We also added a teak table in the galley.
Teak is an interesting wood. I grew up with Oak antique furniture and a wood-burning stove, so I was familiar with refinishing hard woods and lugging cords. Teak is a whole different beast.

Teak is a hard wood, but it sands easily and seems much softer than Oak. Per wikipedia, "Teak, though easily worked, can cause severe blunting on edge tools because of the presence of silica in the wood. Teak's natural oils make it ideal for use in exposed locations and termite and pest proof, where it is durable even when not treated with oil or varnish."

Teak is universally used on boats. Varnishing it is highly controversial. Most teak is just maintained with teak oil. But, we went for the controversial look. What can I say? We are newbees at this whole thing, we are city folk, and we like the shiny glow!

We tried a few different methods for applying the varnish that we researched online. Applying a coat, letting it dry to the touch, sanding with high grit paper (180 or above) and then starting over for 6 coats worked well but took far too long. Instead we stuck with applying 4 coats in rapid succession not allowing each coat to fully dry, then sanding after the 5th and 6th coats.
We might have to refinish it frequently. The clear gloss coat that we put on it seems to wear off easily. Wearing off is ok though. We were more worried about it yellowing in the sunlight. I can report no yellowing after 4 months. We will have to report back to you in another year.

~Captain and Crew

Sunday, February 7, 2010

Weekend Roundup

Over the weekend, I plowed through the rest of Snow Flower and the Secret Fan by Lisa See, because I couldn’t wait to read Elizabeth Gilbert’s eagerly anticipated sequel Committed. I was not disappointed!

I have to say that reading these two books so closely together makes an impact! The juxtaposition of the narrative voice of a submissive traditional Chinese female and the modern professional Westernized woman is quite remarkable. I cried while reading one and laughed out loud with the other.

To quote Gilbert (my hero) on the subject of the childless professional woman:

“Moreover, as I aged, I discovered that I loved my work as a writer more and more, and I didn’t want to give up even an hour of that communion. Like Jinny in Virginia Woolf’s The Waves, I felt at times ‘a thousand capacities’ spring up in me, and I wanted to chase them all down and make every last one of them manifest. Decades ago, the novelist Katherine Mansfield wrote in one of her youthful diaries, ‘I want to work!’--and her emphasis, the hard-underlined passion of that yearning, still reaches across the decades and puts a crease in my heart. I, too, wanted to work. Uninterruptedly. Joyfully.”

What does this have to do with sailing? Absolutely nothing. Truman ran 17 miles this weekend. I ran 4. I flew to Denver for a Boston Scientific Cadaver Course on pelvic reconstruction products. I made a yummy bulgar-wild rice-cabbage-onion-herbes-de-provence-green pea salad to take to the Super Bowl Party. Packed in some dark beer. Did some No Meat Athlete Blog reading.

Absolutely fantastic! Uninterruptedly! Joyfully!
~Lauren

Saturday, February 6, 2010

Renaming a boat


Changing the name of a boat is supposed to bring bad luck. It should only be done in the most dire situations. I wouldn't consider my situation dire at all; Strega II actually had a good ring to it. It means "witch" in Italian, not the good kind but the bad kind. Not thrilled with that, we decided to make the boat ours so we decided on a name change.

According to legend, each and every vessel is recorded by name in the Ledger of the Deep and is known personally to Poseidon, or Neptune, the god of the sea. It is logical therefore, if we wish to change the name of our boat, the first thing we must do is to purge its name from the Ledger of the Deep and from Poseidon’s memory. Some Googling and talking to folks around the harbor I found several ways to accomplish this. The most widely referenced way is an involved process beginning with the removal or obliteration of every trace of the boat’s current identity. This is essential and must be done thoroughly. Then a long ceremonial speech. Some of the other options were just breaking a champagne bottle, having a party, having someone dress up as Neptune, and having a virgin pee on the boat.

Since I didn't have any virgins hanging around, we had a little party, drank some champaign and poured a little overboard for our homies lost at sea and any divinities of the deep.
~The Captain
p.s. We decided on Training Wheels.
By the way, runner up names where as follows:

Bibi Dahl
Ursula Andress
Bond Girl
Miss Moneypenny
Frakin’ ship
Caprica’s Red Dress
Erowin
Strega Too
Off season
Dreams Come Tru
Drifter
Carpe Vino
Surf Taxi
Surf Stalker
Getaway
Casino Royale
Vesper
Gallactica
The World is Not Enough
Moneypenny
You only live Twice
As you wish

Friday, February 5, 2010

One California Girl’s Ode to Sunshine: Fighting Coastal Vitamin D Deficiency


Despite the rain and foggy marine layer, we’ve managed to get a lot of sunshine in recent weekends. Ahhh! Sunlight!!! Oh, the perfect contentedness that only comes from basking in warm sunshine! I can’t live without it!

Exposing ourselves to sunlight is the best way to ensure that our bodies make enough vitamin D. UV rays trigger our skin to make vitamin D. In fact, any dietary vitamin supplement is second-rate compared to the ability of the skin to manufacture vitamin D for us. Thick cloud cover, industrial pollution, sunscreen, and shade can reduce our skin’s ability to produce it by 60%.

Vitamin D deficiency can cause emotional dreariness, muscle aches, bone pain, and vague abdominal pain, and ultimately lead to bone loss, osteoporosis, and rickets. We’ve done such a good job of avoiding the sun and protecting ourselves from skin cancer, that we run the real risk of vitamin D deficiency. If fact, 90% of the patients I’ve tested are deficient!

Vitamin D is a fat soluble vitamin found in cod liver oil, salmon, mackerel, tuna, sardines, milk, eggs, and fortified foods. Vitamin D also comes in many capsule forms, suspended in oil. It makes sense that if taking it in a pill form, one should take it with some form of oil or fat in order to encourage the greatest amount of absorption. Vitamin D stores only last for 3 months in the body. So, we need lots of sunshiny days to fill up regularly! Just what the doctor ordered!